Web Design—Project 1 Basic Design/HTML
Basics of Web Design—Joel Johnson
Project 1 | 2 | 3 | 4 | 5 | 6
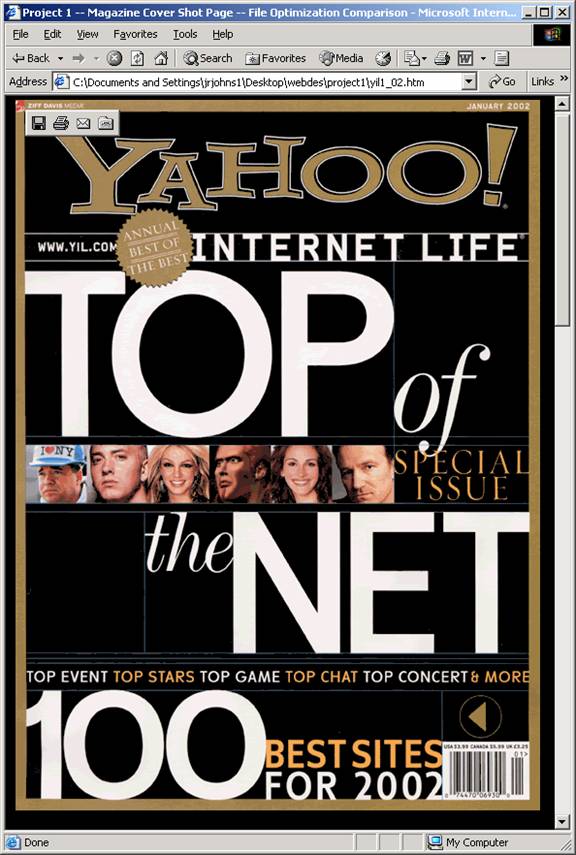
Project 1: create a basic HTML page. Scan one current magazine cover, “Save for Web” in Photoshop, and make a link to this image and to the magazine’s Web site. These pages should have the appearance of a critique of the magazine, design, topics, etc. You do not need to seriously research these topics, just present a clean professional appearance. Make up text content here or credit sources if you want to gather external content.
An example is provided below of this two page assignment. Click on the browser (Internet Explorer) screen shots to see the working HTML examples.
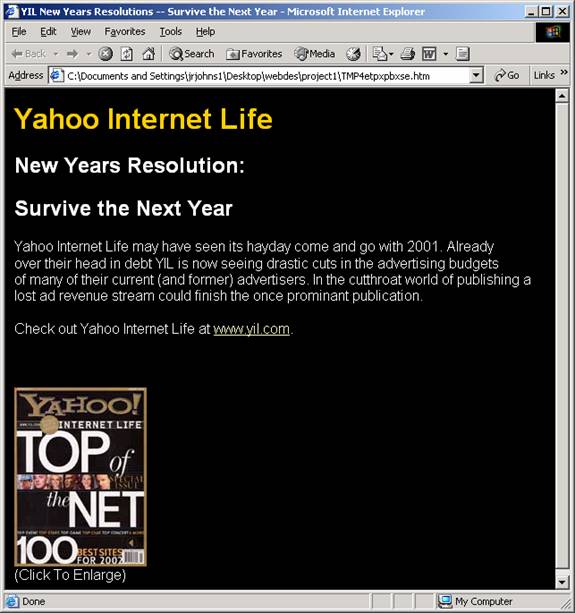
Yahoo Internet Life
New Years Resolution:
Survive the Next Year
Yahoo Internet Life may have seen its heyday come and go with 2001. Already
over their head in debt YIL is now seeing drastic cuts in the advertising budgets
of many of their current (and former) advertisers. In the cutthroat world of publishing a
lost ad revenue stream could finish the once prominent publication.
Check out Yahoo Internet Life at www.yil.com.

(Click To Enlarge)

Web Design—Project 2 Columns (print style)
Basics of Web Design—Joel Johnson
Project 1 | 2 | 3 | 4 | 5 | 6
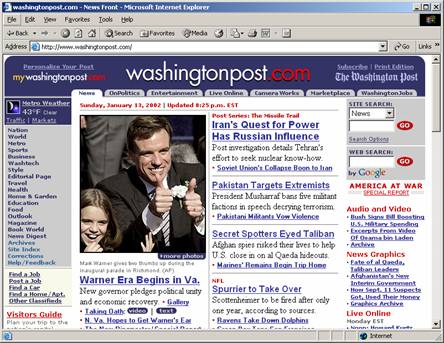
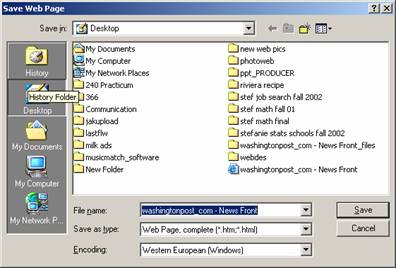
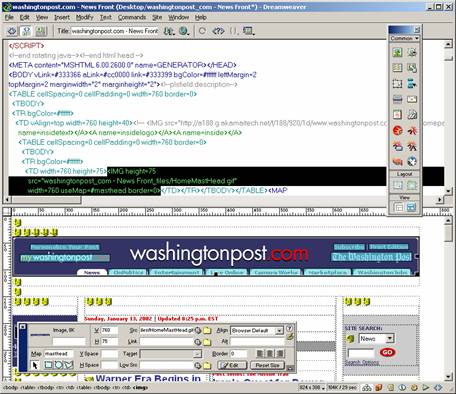
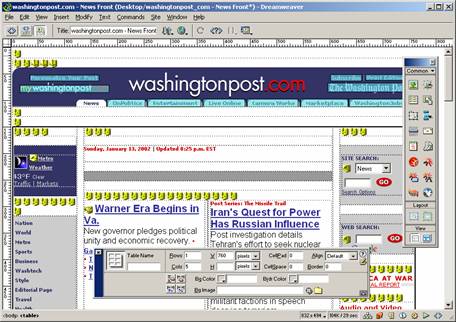
Project 2: Dissecting columns. This project requires the use of two column style pages. Compare and contrast the two approaches used. Consider column width, white space, visual appeal, areas of focus, and of course FACES. Don’t forget to open these sites in Dreamweaver, check browsers, screen resolutions, platforms, etc. Try to use pages that rely heavily on column based design. News/Information sites are often laid out this way. Make sure to save the sites as “Web Page Complete (Internet Explorer)” in order to evaluate them in Dreamweaver. Click on the browser (Internet Explorer) screen shot to go to the Washington Post Web site.
In Dreamweaver click around the page (particularly on table borders indicated by dashed lines) while watching the properties window to examine details of each site. Look for column and row widths and heights, color schemes, font schemes, navigation type, whatever you can discover. If you select something on the page and then view the code Dreamweaver will highlight the code that generated the selection (shown below in Dreamweaver 4).
Web Design—Project 3 Frames
Basics of Web Design—Joel Johnson
Project 1 | 2 | 3 | 4 | 5 | 6
Frames are considered out of bounds by many Web designers. They can lead to some very major usability issues if they are used poorly. Used correctly, frames can allow site elements (e.g. navigation and banner) to exist as separate HTML documents. They allow a designer to fully compartmentalize a site. Navigation, banners, headers, footers, logos, etc. can be fully separated from other page elements. This can bring high levels of site consistency and rapid load times. The page below is about 30 Kb everything is generated using HTML code except the animation (25 Kb). Project 3 will require you make a basic frame-based page. This project can be a frameset as visually simple as this example below and using frames as simply as the k9-rx site example. Place a navigation system in a frame or use framesets for headers and footers. Try to keep this page relatively simple, frames will not tolerate the many things that tables and layers will and there are several significant properties unique to frames that must be understood to use them. This site is the HTML example of this project.
The page above is comprised of 3 framesets, one inside another and that one inside the third. Below are shown the properties of the first frameset: three rows and one column. The top and bottom rows here are designed to block off the header and footer areas giving each 50 pixels of space. The middle row is given a value of 1 relative and will take up any vertical space that is left.


Here are the three columns and one row that make the second frameset. It is inside the middle row (nested) of the frameset above. In this frameset the left and right columns each take up 1 relative meaning they will split any leftover horizontal space and center horizontally the center column. The center column defines the width of the center area you see on the final page (570 pixels).


The final frameset is inside of the middle column of the second frameset. It has three rows and one column as well. The top and bottom row each take up 1 relative meaning they will split any leftover vertical space and center vertically the center row.


Web
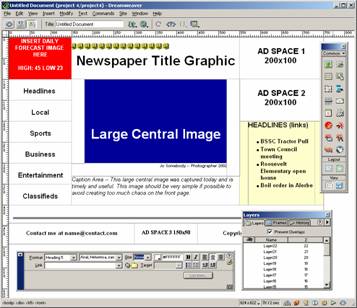
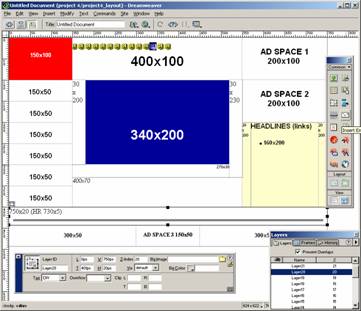
Design—Project 4 Compartmental (Layers)
Basics of Web Design—Joel Johnson
Project 1 | 2 | 3 | 4 | 5 | 6
First create a rough design outline on paper (or digitally) of how the compartmental areas will be laid out. Keep track of every pixel and keep the total width inside of 750 pixels. Generate this design in Dreamweaver (IN LAYERS) using only the most basic elements (text, plain button/banners, etc.). Get a feel for the design and spacing of the layer based design, and then write up a brief one page rationale for the layout. This project will require a basic understanding of layers to complete effectively. Click on the Dreamweaver screen shots to see the working HTML examples.
Web Design—Project 5 Visual Analogy
Basics of Web Design—Joel Johnson
Project 1 | 2 | 3 | 4 | 5 | 6
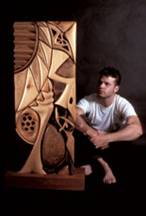
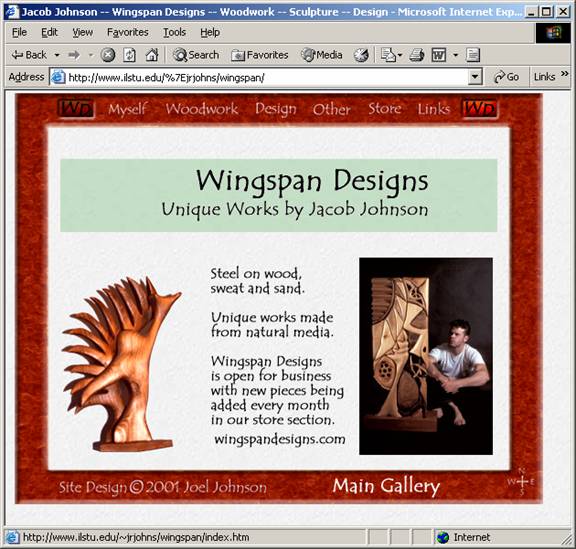
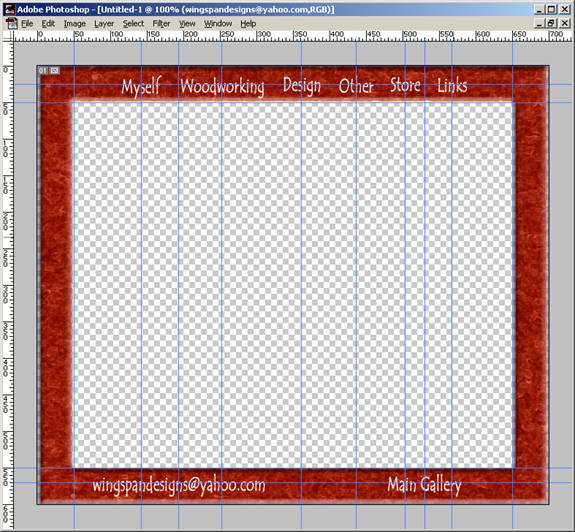
Visual analogies can be some of the most difficult elements to include effectively in any media. This project follows a set of instructions to generate a page that uses the visual analogies of frames and wood to create a unique and interesting look. This page will use some extensive graphics work in Photoshop, complex slicing techniques, JavaScript rollovers, and layer-based design. This is a tutorial explaining how to create the frame (plus its “over” state). Included are the 3 unique images used to create this page. The font used throughout this site is Tempus Sans. The width of the final frame is going to be 700 pixels and the height is 600 pixels. Change this initial height to change the size of a site. Click on the browser (Internet Explorer) screen shot to see the HTML version of this site. **NOTE** This site is a "black hole" meaning you will not be able to use your browsers back button to return to this site.

![]()

Step 1. Make a folder and name it woodweb in this folder put in a folder called up and a folder called over.
Step 2. Begin by creating a new PhotoShop document that is 600 x 500 (WxH) pixels, 72dpi, and RGB color.
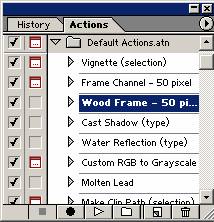
Step 3. In the Actions window (below, left) Play the Wood Frame Action.
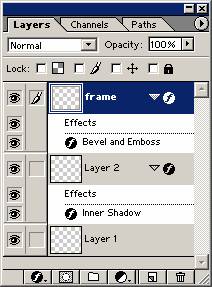
Step 4. Make sure the frame layer is active (above, right) and then apply (with default settings) first the Filter Brushstrokes < Crosshatch.
Step 5. Apply the Filter Brushstrokes < Accented Edges.
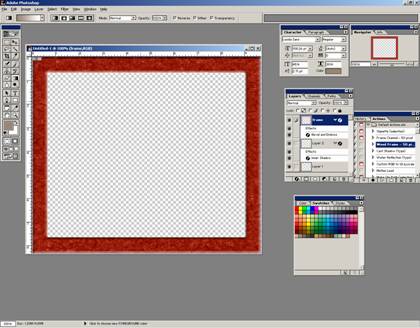
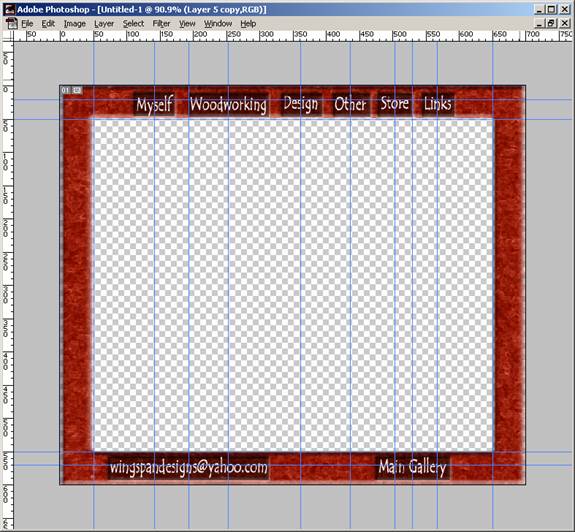
Step 7. Give it some life with Image < Adjust < Brightness/Contrast bring down the Brightness and bring the contrast up (to adjust the colors go to Image < Adjust < Color Balance). It should look something like the image below.
Step 8. Create guides to create a working area. Place guides 50 pixels from each edge (to set rulers to pixels go to Edit < Preferences < Units and Rulers and change Ruler to Pixels), also create guides along the middle of the top and bottom of the frame for text to line up on. Hold down shift when you place guides to snap to ruler marks.
Step 9. Create a button in white text (Tempus Sans 60 pt.). Make the button with an average width first to allow adequate spacing. Then Duplicate Layer the new Text layer 8 times.
Step 10. Change the text to the correct words then move them into visibly good position and create guides at the center of these new elements. Remember, guides will only snap to active layers. These guides will help you place new text in the buttons later if the categories change.
Step 11. Save this file, name it frame1 in your up folder.
Step 12. In a New Layer on top of all the others create a rectangular marquee that is a Fixed Size of 120 x 30. This rectangular selection will seem too tight but the small size allows for maximum letter size in the frame space available. This is the height of all of the text and the width of “Woodworking”. It may be better to move “Woodworking to the outside of the frame to de-emphasize its size. Each word or group of words will need a different width rectangular selection. Move this marquee over “Woodworking” until it covers it. Move the center guide line in these steps if it is necessary to keep the marquee in the frame area. Use the arrow keys if it is difficult to move things with the mouse.
Step 13. Select the Paintbucket tool (opacity %50) and black as the color and paint the selection.
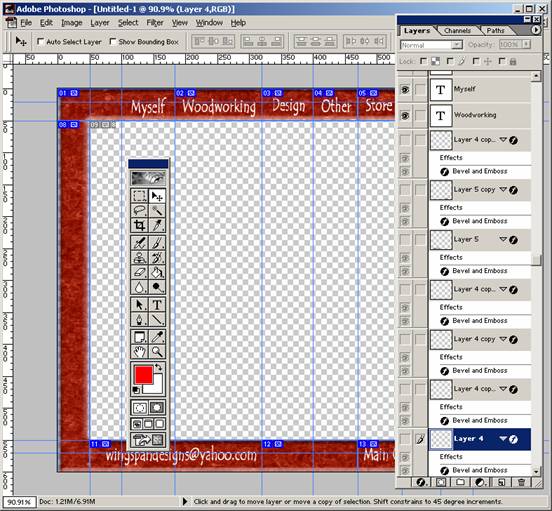
Step 14. Apply the Layer Effect (default setting) outer bevel to the rectangle. Arrange the layers so that the rectangle of black is behind the lettering. Repeat steps 10, 11, and 12 for all of the words on the frame. Alternately—duplicate the first layer eight times and use Edit < Free Transform (Cntrl T, Command T Mac) to size each rectangle to each word.
Step 15. **Save As** [NOT SAVE] this file as frame2 in the over folder.
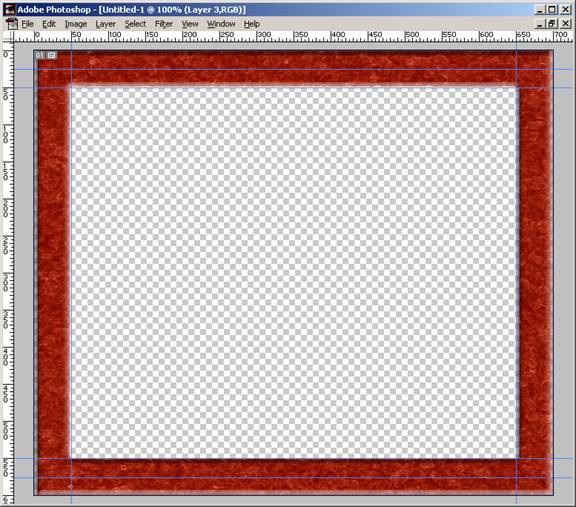
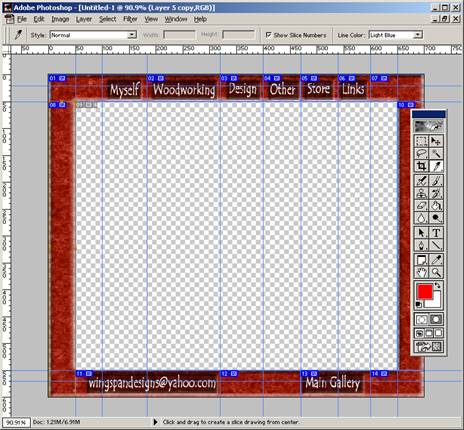
Step 16. Plan a way to slice this image up into pieces with a maximum height or width of 50 pixels. Use guides to mark out the slices on screen and remove any guide lines that do not represent cuts. Hold shift as you move the guides to snap to Ruler marks.
Step 17. Use the Slice tool to partition your frame. It will snap to your guides.
Step 18. File < Save For Web will bring up the window below. Use the slice select tool to select all but the center slice (hold down shift to select multiple slices). Make sure to save in the over folder.

Step 19. Remove the rectangles by unchecking their layer visibility box (looks like an eye when it is checked).
Step 20. Save for Web again (in the up folder) and the page is ready for construction in Dreamweaver.
Step 21. Because Photoshop has saved an HTML table this part is very simple. In Dreamweaver open the HTML document Photoshop created located in the up folder. Make sure the Behaviors window is open and select the image in the upper left hand corner.
Step 22. Go to Site < Define < New and define this site as woodweb. In Local Info, and Site Map Layout make the root folder woodweb and make the home page the HTML document Photoshop put in the up folder (browse to locate this file).
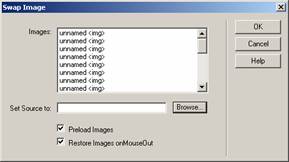
Step 23. Click on the + (plus sign) in the Behaviors window and select Swap Image this will cause a rollover effect when the area has a mouse cursor over it.
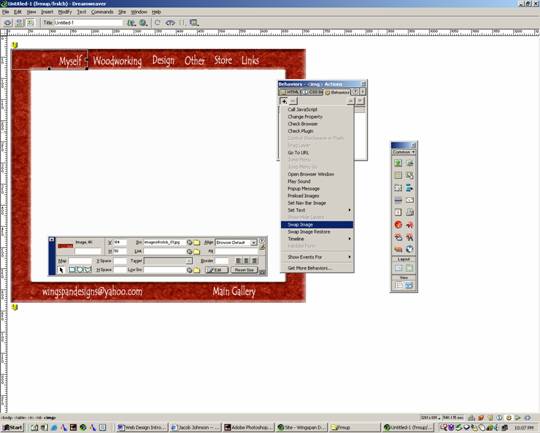
Step 24. Browse for the matching image in the “over” group of slices.
Step 25. Repeat Step 23 until you have created rollovers for each active area (do not do the areas that are not changing).
Step 26. Go to File < Preview In Browser to test your page.
Step 27. In Dreamweaver Modify < Convert < Convert Tables to Layers
Step 28. Replace the center (white) layer with, the text and the photos. Add the background image.
Web Design—Project 6 Advanced Topics
Basics of Web Design—Joel Johnson
Project 1 | 2 | 3 | 4 | 5 | 6
This project is designed to explore some advanced Web design elements. Flash, DHTML, XML, SMIL, Real, QuickTime, Forms, CSS, and any other Web design related topics will work for this project. This project is exploratory in nature so topics do not need to be applied. Define what the topic is, what can be done with it, working examples, web Links, and required software.
Two sample projects are presented below (These are dated, but the links are good).
Advanced Concepts XML
|
WHAT IS IT? XML Web workshop--Developers
Guide--Demos WHAT CAN YOU DO WITH IT? WORKING EXAMPLE (WITH HTML CODE) XML Film Reviewer WEB LINKS AND MORE INFORMATION WHAT SOFTWARE IS REQUIRED, WHERE DO YOU GET ACCESS TO IT, AND HOW MUCH DOES IT COST? XML and SGML
Authoring HotMetal Pro |
Advanced Concepts DHTML
|
WHAT IS IT?
WHAT CAN YOU DO WITH IT?
WEB LINKS TO MORE INFORMATION ABOUT TOPIC? Inside DHTML an in-depth newsletter
about all things DynamicHTML Project Cool Developer Zone DHTML Demos WebCoder WHAT SOFTWARE IS REQUIRED, WHERE DO YOU GET ACCESS TO IT, AND HOW MUCH DOES IT COST? Dreamweaver DHTML
Authoring/Editing Software |
Fall 2000 Student Topic Exam Questions
Templates and Libraries
Name two reasons why templates are used.
Site consistency
Maintenance restrictions to protect design
What’s the difference between templates and libraries?
A template is a design model putting limits on site changes; a library is a storage area for site elements.
Forms
Why are forms one of the most important elements of a Web site?
They allow interaction between the site managers and the site users.
What
does CGI stand for?
Common Gateway Interface
What is a jump menu used for?
A jump menu offers rapid access to site areas while taking up little on screen space.
DHTML
What does DHTML stand for?
Dynamic HTML
What does DHTML offer for Web sites?
DHTML offers Dynamic, interactive content, high levels of design control in a plug-in free environment.
Name three technologies that are included in DHTML.
HTML
CSS
Javascript
Commands
Name two commands Dreamweaver comes installed with.
Clean up Word HTML
Create Web photo album
Color Scheme
Optimize
Image In Fireworks
Explain what one of the commands you listed enables you to do.
-Clean up Word HTML allows you to remove Microsoft specific code allowing easier maintenance within Dreamweaver.
-Color Scheme = allows you to choose and change the color scheme for the background and text of a web page.
-Create Web Photo Album = allows you to quickly create a web page in which you can display pictures in a folder.
-Optimize Image in Fireworks = allows you to optimize images in fireworks which makes the file size smaller.
Automation
Name at least two things that the history palette is good for.
- shows you what you've done so far
- can make changes without clicking undo/redo all of the time
-can make the same changes from one document to another without retyping
CSS (Cascading Style Sheets)
For what purpose would one use CSS?
You would use CSS to achieve a high level of text and design control.